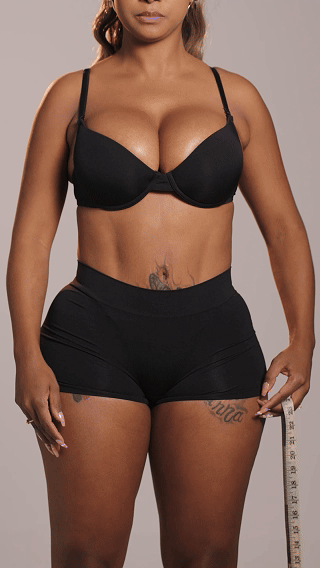


You didn't just get "a procedure." You got the DREAM COMBO: Lipo 360 to carve your waist, define your back, and sculpt your abdomen, PLUS BBL to create curves that stop traffic. You essentially had surgery on 80% of your body. Your recovery isn't "challenging"—it's a full-time commitment.
And the single most critical tool in that recovery? Your Stage 2 faja specifically engineered for the Lipo 360 + BBL combination.
Generic BBL fajas don't account for 360 lipo. Generic lipo fajas don't protect your BBL. You need compression that does BOTH: aggressive where you had lipo removed, strategic zero-pressure where fat was transferred.
This is your complete recovery protocol—the timeline, the expectations, the compression zones, the mistakes that sabotage results, and exactly which Stage 2 fajas work for dual procedures. I'm giving you the roadmap surgeons assume you know but rarely explain in detail.
Your results are being determined right now, in these critical weeks. This protocol is your blueprint.
Understanding the Lipo 360 + BBL Combination: Why It's Complex
Before the timeline, understand what happened to your body:
The Lipo 360 Component
Areas Treated:
- Abdomen (upper and lower)
- Flanks (love handles, both sides)
- Lower back
- Upper back (if included)
- Sometimes: bra line, arms
What Was Done:
- Fat cells mechanically removed via cannula
- Tunnels created through tissue
- Blood vessels disrupted
- Lymphatic channels temporarily damaged
- Skin separated from underlying structures
Healing Requirements:
- High compression (25-35 mmHg) to collapse tunnels
- Prevention of seroma (fluid accumulation)
- Promotion of skin adherence to new contours
- Control of massive inflammation response
- Support for weakened tissue structure
The BBL Component
What Was Done:
- Fat harvested (usually from lipo areas)
- Fat purified and prepared
- Fat injected strategically into glutes (200-600 tiny injection sites)
- Approximately 30-60% of transferred fat will survive
Healing Requirements:
- ZERO direct pressure on glutes for 2-8 weeks
- Maximum blood flow to transferred fat (pressure kills it)
- Strategic compression around (not on) BBL to shape
- Lymphatic drainage to remove inflammation without disturbing fat
- Positioning that protects transfer while allowing life
The Combination Challenge
You need:
- ✅ High compression on 360 lipo areas
- ✅ Zero compression on BBL areas
- ✅ Everything in ONE garment you can wear 23 hours daily
- ✅ Adjustability for dramatic body changes
- ✅ Comfort for 6-8 weeks of religious use
This is why generic shapewear fails. You need precision-engineered Colombian fajas designed for exactly this combination.
Week-by-Week Recovery Timeline with Compression Protocol
Week 1: Immediate Post-Op (Days 1-7) - Stage 1
What's Happening in Your Body:
- Acute inflammation at maximum
- Surgical sites bleeding/oozing
- Massive fluid accumulation
- Pain at peak levels
- Body in shock/trauma response
- Transferred fat establishing blood supply
Compression Requirements:
- Stage 1 faja (maximum 30-40 mmHg compression)
- Worn 24 hours (only removed for drain management if applicable)
- Possible foam boards over problem areas
- ABD pads over incisions
Physical State:
- Cannot stand fully upright
- Cannot sit normally (BBL restriction)
- Extreme fatigue
- Swelling so significant you don't recognize your body
- Bruising spreading and worsening
Stage 1 Faja Recommendation:
Lipo 360 + BBL Stage 1 Full Body - Maximum compression for immediate post-op control with strategic BBL-safe design.
Critical Mistakes to Avoid:
- ❌ Removing faja for "breaks" (inflammation rebounds)
- ❌ Sitting directly on glutes (kills transferred fat)
- ❌ Expecting to look good (you look worse before better)
- ❌ Panicking about asymmetry (normal at this stage)
Weeks 2-3: Transitioning to Stage 2 - Early Phase
What's Happening in Your Body:
- Acute inflammation beginning to resolve
- Drains removed (if you had them)
- Incisions closing/healing
- Transferred fat establishing permanent blood supply (CRITICAL PERIOD)
- Energy levels slightly improving
- Major swelling still present but reducing
Compression Requirements:
- TRANSITION TO STAGE 2 FAJA (25-35 mmHg)
- Still wearing 23 hours daily (1 hour for showering/washing faja)
- Tighten adjustments as swelling reduces
- Add foam boards to target lumpy areas
- Begin lymphatic massage (gentle)
Physical State:
- Can stand more upright
- Still cannot sit normally (BBL)
- Using BBL pillow for necessary sitting
- Seeing first glimpses of results under swelling
- Discomfort rather than pain
Stage 2 Faja for This Phase:
Stage 2 BBL Faja with Built-In Bra- Comprehensive compression for all 360 areas while protecting BBL. The built-in bra is critical if you had back/bra line lipo.
What You'll Notice:
- Dramatic reduction in swelling from Week 1
- Bruising spreading then fading
- Your shape emerging (exciting!)
- Adjustment hooks loosening (you're shrinking)
- Increased energy and mobility
Critical Mistakes to Avoid:
- ❌ Switching to Stage 2 before surgeon approves (usually day 10-14)
- ❌ Skipping faja to "see results" (rebound swelling)
- ❌ Sitting on glutes "just for a minute" (kills fat cells)
- ❌ Buying faja too small (creates indentations)
Weeks 4-5: Stage 2 - Middle Phase (The Turning Point)
What's Happening in Your Body:
- Inflammation significantly reduced (you're 60-70% healed)
- Transferred fat survival determined (what's alive now stays)
- Skin beginning to adhere to new contours
- Lymphatic system recovering
- Scar tissue forming internally
- Results visible despite remaining swelling
Compression Requirements:
- Stage 2 faja (still 25-35 mmHg)
- Can reduce to 20-22 hours daily if surgeon approves
- Continue adjusting tighter as body shrinks
- Foam boards on any irregular areas
- Lymphatic massage 2-3x weekly
Physical State:
- Can sit on glutes with BBL pillow (most surgeons clear at week 4-6)
- Significantly more mobile
- Can return to light work/activities
- Sleep is easier
- Mentally feeling positive about results
Faja Considerations:
You may need to size down or purchase second Stage 2 faja if your current one is maxed out on adjustments. This is NORMAL and expected. Your body has reduced significantly.
Alternative Option for This Phase:
Stage 2 Braless Short for BBL - If you didn't have upper body lipo or prefer separate bra, this focuses compression where you need it.
What You'll Notice:
- Your waist is defined
- BBL projection is visible
- Clothing fits completely differently
- Energy is near-normal
- Emotional state improving dramatically
Critical Mistakes to Avoid:
- ❌ Stopping faja too early because you "look good" (you're only 70% healed)
- ❌ Returning to gym too aggressively (inflammation rebounds)
- ❌ Skipping lymphatic massage (helps lumps/irregularities)
- ❌ Comparing your week 5 to someone's 6-month results (patience)
Weeks 6-8: Stage 2 - Final Phase (Refinement Period)
What's Happening in Your Body:
- Inflammation mostly resolved (90% healed)
- Skin fully adhered to contours
- Internal scar tissue matured
- Final shape emerging clearly
- Residual swelling minimal and manageable
- Body tolerating increased activity
Compression Requirements:
- Stage 2 faja (can reduce to 18-20 hours if approved)
- May transition to Stage 3 at week 6-8 (surgeon-dependent)
- Continue targeting any remaining irregular areas
- Lymphatic massage as needed for problem spots
Physical State:
- Can sit normally (most surgeons clear full sitting by week 6-8)
- Can exercise moderately (walking, light weights)
- Sleep without faja if approved (some surgeons still require nights)
- Life feels near-normal
- Results look consistently good day-to-day
Preparing for Stage 3 Transition:
Purchase Stage 3 faja now so you're ready when surgeon clears you. Don't wait until the day of approval.
Stage 3 Option to Purchase:
BBL & Lipo Stage 3 Strapless Faja - Refined compression for the next phase of recovery.
What You'll Notice:
- Your results are DRAMATIC compared to pre-surgery
- Minor fluctuations in swelling (hormonal, activity-related)
- Faja feels comfortable rather than restrictive
- Confidence skyrocketing
- Excitement about final results
Critical Mistakes to Avoid:
- ❌ Skipping Stage 3 entirely (transition is important)
- ❌ Thinking you're "done" at 8 weeks (you need 4-6 months for final results)
- ❌ Returning to pre-surgery eating habits (maintain your results)
- ❌ Neglecting sunscreen on scars (hyperpigmentation risk)
Compression Zone Breakdown: Where You Need What
Understanding compression zones is critical for Lipo 360 + BBL:
HIGH Compression Zones (30-35 mmHg) - Where Fat Was REMOVED
Abdomen (Upper and Lower):
- Maximum inflammation after lipo
- Prone to seroma formation
- Needs aggressive compression for smooth adherence
- Target area for foam boards if lumpy
Flanks (Love Handles):
- Often most stubborn post-lipo swelling
- Critical for waist definition
- Needs consistent firm compression
- May need extended Stage 2 (10-12 weeks)
Lower Back:
- Tends to swell significantly
- Important for posterior hourglass view
- Often overlooked but critical
- High-back design fajas excel here
Upper Back/Bra Line (if treated):
- Needs compression but often forgotten
- Creates back rolls if under-compressed
- Built-in bra fajas address this
MODERATE Compression Zones (25-30 mmHg) - Supporting Areas
Upper Thighs (if treated):
- Moderate compression promotes drainage
- Prevents fluid accumulation
- Graduated compression (tightest at top)
Under-Bust/Rib Cage:
- Supporting compression for posture
- Not treated but needs gentle shaping
- Helps create hourglass silhouette
ZERO Compression Zones - Where Fat Was TRANSFERRED
Glutes (BBL Area):
- ABSOLUTELY ZERO direct pressure
- Fajas must have open-butt design or strategic cutouts
- Any pressure = fat cell death = lost results
- This is NON-NEGOTIABLE
Hip Dips (if fat was transferred there):
- Same zero-pressure rule
- Strategic faja design routes compression around injections
The Best Stage 2 Fajas for Lipo 360 + BBL Combination
Not all Stage 2 fajas work for dual procedures. These do:
#1: Stage 2 BBL Faja with Built-In Bra (Most Comprehensive)
Why It's Perfect for Lipo 360 + BBL:
- Covers ALL typical lipo 360 areas (abdomen, flanks, back, bra line)
- Strategic open-butt design protects BBL
- Built-in bra eliminates need for separate garment
- Triple-adjustment rows accommodate dramatic size changes
- 30-35 mmHg compression in lipo zones
Best For: Patients who had complete 360 including upper back/bra line lipo.
Price: $115-135
#2: Lipo Stage 2 Full Body with No Bra (Maximum Coverage)
Why It's Perfect for Lipo 360 + BBL:
- Extends to mid-thigh (if you had thigh lipo too)
- High-back design for aggressive back/flank compression
- Open-butt BBL-safe construction
- Arm sleeves if you had arm lipo
- 28-35 mmHg throughout
Best For: Extensive lipo 360 + arms + thighs + BBL. The most comprehensive option.
Price: $125-145
#3: High-Back Stage 2 BBL Faja (Back-Focused)
Why It's Perfect for Lipo 360 + BBL:
- Extra-high back panel (critical for back/flank lipo)
- 32-40 mmHg in back (highest available)
- Strategic glute-sparing design
- Vertical compression panels create dramatic waist
- Posture-supporting construction
Best For: Aggressive back and flank lipo with BBL. If your surgeon did significant back work, this is your answer.
Price: $110-130
#4: Seamless Stage 2 for Return to Work
Why It's Perfect for Lipo 360 + BBL:
- Completely invisible under work clothes
- Laser-cut edges (no VPL)
- Effective 25-30 mmHg compression
- BBL-safe open design
- Modern, non-medical aesthetic
Best For: Weeks 4-8 when returning to work and need invisibility under professional clothing.
Price: $125-145
Common Complications and How Your Stage 2 Faja Prevents Them
Complication #1: Seroma Formation
What It Is: Fluid accumulation in lipo areas creating squishy pockets.
Prevention via Faja:
- Consistent compression collapses tunnels where fluid accumulates
- 23-hour daily wear prevents fluid from collecting
- Proper compression level (25-35 mmHg) maintains necessary pressure
If It Develops: Surgeon may drain it; continue wearing faja religiously to prevent recurrence.
Complication #2: Fat Necrosis (BBL)
What It Is: Transferred fat cells dying, creating hard lumps or oil cysts.
Prevention via Faja:
- Zero pressure on BBL zones (open-butt design critical)
- Strategic compression around BBL improves overall circulation
- Proper fit prevents shifting that might press on glutes
If It Develops: Usually resolves over months; massage helps; ensure faja isn't applying any BBL pressure.
Complication #3: Skin Irregularities/Waviness
What It Is: Uneven skin texture, ripples, or waves in lipo areas.
Prevention via Faja:
- Consistent compression promotes smooth skin adherence
- Foam boards target specific irregular areas
- Extended Stage 2 wear (8-10 weeks) reduces risk
If It Develops: Aggressive lymphatic massage + continued compression + potentially extended Stage 2.
Complication #4: Asymmetry
What It Is: One side looks different than other (size, shape, projection).
Prevention via Faja:
- Symmetrical compression ensures even healing
- Proper fit prevents one side being compressed more than other
- Consistent wear prevents one side swelling more
If It Develops: Often improves by 6 months; ensure faja fits symmetrically; surgeon may recommend revision if persistent.
Complication #5: Lost Fat Transfer Volume
What It Is: BBL looking significantly smaller than immediate post-op.
Prevention via Faja:
- Zero pressure on glutes (most critical factor)
- Adequate compression around BBL improves blood flow to area
- Proper wear schedule maximizes fat survival
What's Normal: 30-40% fat loss is expected and normal. More than 50% suggests problem (pressure, poor blood supply, technique issues).
Lymphatic Massage: Your Faja's Partner in Recovery
Stage 2 faja + lymphatic massage = optimal results.
Frequency:
- Weeks 2-4: 3-5x weekly (professional or self if trained)
- Weeks 4-8: 2-3x weekly
- Weeks 8+: As needed for problem areas
What It Does:
- Moves trapped fluid out of tissues
- Breaks up early fibrosis (hard lumps)
- Improves circulation
- Accelerates swelling resolution
- Enhances final smoothness
Technique with Faja:
Remove faja for massage session (30-60 minutes), then immediately put faja back on. The compression after massage locks in benefits.
DIY Tool:
Lymphatic Drainage Massager - Professional-quality tool for at-home use.
Combined with:
3-Pack Lipo Foam Boards - Place over massaged areas under faja for targeted compression.
Foam Boards: The Secret Weapon for Smooth Results
What They Are: Medical-grade foam sheets that create focused compression over problem areas.
How to Use with Stage 2 Faja:
- Identify lumpy/irregular areas after swelling reduces (week 3+)
- Cut foam to size slightly larger than problem area
- Place foam against skin in problem zone
- Put Stage 2 faja over foam
- Foam creates additional focused compression (5-10 mmHg extra)
- Wear 20-23 hours daily until area smooths (4-8 weeks typically)
Best Areas for Foam:
- Abdominal irregularities
- Flank lumps
- Lower back bumps
- Any area that feels hard or uneven
Product: Lipo Foam Boards 3-Pack - $20-35 for set that you'll cut to size.
Sitting Protocol for BBL with Lipo 360
This is critical and often confusing:
Weeks 1-2: ZERO Direct Sitting on Glutes
- Use BBL pillow for necessary sitting (toileting)
- Stand or lie down only
- No exceptions
Weeks 2-4: Limited Sitting with BBL Pillow
- BBL Pillow mandatory for any sitting
- Limit sitting to 15-20 minutes at a time
- Primarily lie down or stand
Weeks 4-6: Extended Sitting with BBL Pillow
- Can sit longer periods with pillow
- Many surgeons allow 1-2 hours at a time
- Still no direct pressure on glutes
Weeks 6-8: Gradual Introduction of Normal Sitting
- Most surgeons clear some direct sitting
- Start with 30 minutes, increase gradually
- Monitor for changes in BBL projection
- Return to pillow if projection decreases
Week 8+: Normal Sitting Usually Cleared
- Surgeon-dependent (some require 12 weeks)
- Fat is now established with permanent blood supply
- Normal activities resumed
Your Stage 2 faja protects your BBL during this progression, but the sitting protocol is equally critical.
Signs You Need to Extend Stage 2 (Beyond Standard 6-8 Weeks)
Some patients benefit from 10-12 weeks in Stage 2:
Sign #1: Significant Fluctuation in Size
If you wake up one size and end the day dramatically larger, inflammation is still active.
Sign #2: Persistent Lumps/Irregularities
Fibrosis or indurations that aren't resolving need extended compression.
Sign #3: Continued Fluid Accumulation
If areas feel squishy or fluid-filled, you need more Stage 2.
Sign #4: Your Surgeon Recommends It
Especially common for:
- Extensive lipo volume (>3000cc removed)
- BBL with large transfer volume
- Patients with slower healing
- Revisions or secondary procedures
Extended Stage 2 isn't failure; it's optimization.
Transitioning from Stage 2 to Stage 3: The Protocol
Timing: Typically weeks 6-8, but surgeon may extend to 10-12.
Signs You're Ready:
- ✅ Swelling minimal and consistent day-to-day
- ✅ No active fluid accumulation
- ✅ Tissues feel firm, not squishy
- ✅ Stage 2 feels noticeably loose even with hooks tightened
- ✅ Surgeon approval
How to Transition:
- Purchase Stage 3 faja before you need it
- Week 1: Wear Stage 3 during day, Stage 2 at night
- Week 2: Wear Stage 3 day and night, keep Stage 2 as backup
- Monitor for increased swelling (if occurs, extend transition)
Stage 3 Recommendation:
BBL & Lipo Stage 3 Strapless - Refined 20-30 mmHg compression for weeks 8-16+.
Real Talk: The Emotional Rollercoaster
Week 1-2: "What did I do to myself? This was a mistake. I look worse. This isn't worth it."
Week 3-4: "Okay, I can see something emerging. Maybe this will work. Still scared."
Week 5-6: "OMG this is amazing. I can't believe this is my body. Best decision ever."
Week 7-8: "Impatient for final results but feeling good about the journey."
THIS PROGRESSION IS UNIVERSAL. Every woman who gets Lipo 360 + BBL goes through this. The ones with the best results push through the difficult early weeks, follow their faja protocol religiously, and trust the process.
Your Stage 2 faja is your physical support. This community is your emotional support. You've got this.
Frequently Asked Questions
My surgeon said I need Stage 2 for 12 weeks. Is that excessive?
No. For extensive lipo 360 + BBL, 10-12 weeks in Stage 2 is often optimal rather than excessive. Extended compression ensures maximum smoothness and fat retention. Some surgeons are more conservative (appropriately so).
Can I wear my Stage 2 faja to the gym?
Weeks 2-4: No gym (light walking only)
Weeks 4-6: Light gym (walking, light weights) with faja is fine
Weeks 6-8: Moderate exercise with faja okay; remove for very intense cardio if it restricts breathing
Always shower and change faja after sweaty workouts.
I'm between sizes. Which should I choose for Stage 2?
For weeks 2-4: Size UP (you're maximally swollen; too small is torture)
For weeks 4-8: Size DOWN (you want firm compression)
Or buy both sizes: larger for early Stage 2, smaller for late Stage 2.
My faja is rolling at the waist/thighs. What do I do?
Rolling means:
- Faja is too big (you've shrunk; tighten or size down)
- OR faja style isn't right for your proportions
- OR you need silicone strips at edges
Try: Tightening adjustments, wearing shapewear slip under faja, or changing to style with silicone grip strips.
Can I use a sauna/steam room in my Stage 2 faja?
NO. Excessive heat increases inflammation and can damage elastic fibers in faja. Wait until Stage 3+ and even then, limit sauna use during first 6 months.
I feel like my BBL is getting smaller. Is my faja too tight?
Possible but unlikely if using BBL-appropriate faja with open-butt design. More likely:
- Normal reabsorption (30-40% loss is expected)
- Swelling reducing (BBL looks smaller as swelling resolves then plumps back up)
- Check: Is faja applying ANY pressure to glutes? If yes, stop immediately.
Your Complete Lipo 360 + BBL Recovery Shopping List
Essential Purchases:
✅ Stage 1 Faja (week 1) - $100-150
✅ Primary Stage 2 Faja (weeks 2-8) - $115-145
- Built-In Bra OR
- High-Back
✅ Backup Stage 2 Faja (washing rotation) - $98-145
✅ BBL Pillow (weeks 1-8) - $30-45
✅ Lipo Foam Boards (weeks 3-12) - $20-35
✅ Lymphatic Massager (weeks 2-12) - $25-40
- Drainage Massager
Optional But Valuable:
✅ Stage 3 Faja (purchase ahead of need) - 125-145
✅ Arnica supplements (reduce bruising)
✅ Compression socks (prevent blood clots)
Total Investment: $400-600 for optimal recovery setup
ROI: Protecting your $12,000-18,000 combined procedure investment
The Bottom Line: Your Dual-Procedure Results Depend on Precision Compression
Lipo 360 + BBL isn't one procedure—it's TWO complex surgeries performed simultaneously. Your recovery requires compression that addresses both:
✅ Aggressive where fat was removed (lipo zones)
✅ Zero where fat was transferred (BBL zones)
✅ Strategic everywhere else (supporting areas)
Generic fajas fail because they're designed for ONE procedure, not the combination.
The women with the absolute best Lipo 360 + BBL results at one year—the ones with snatched waists, smooth skin, and dramatic BBL projection that lasted—wore the RIGHT Stage 2 faja religiously for the full 6-12 weeks.
You've invested in the dream combo. Now protect that investment with precision compression.
Your surgeon carved your body. Your Stage 2 faja refines it into the masterpiece you envisioned.
👉 Shop Stage 2 Fajas for Lipo 360 + BBL
👉 Complete BBL Recovery Bundle
Your dream body is healing. Give it exactly what it needs. Every. Single. Day.